설치
새 프로젝트를 시작하거나 처음부터 시작하거나, 기존 프로젝트를 마이그레이션할 수 있습니다.
프로젝트 시작하기
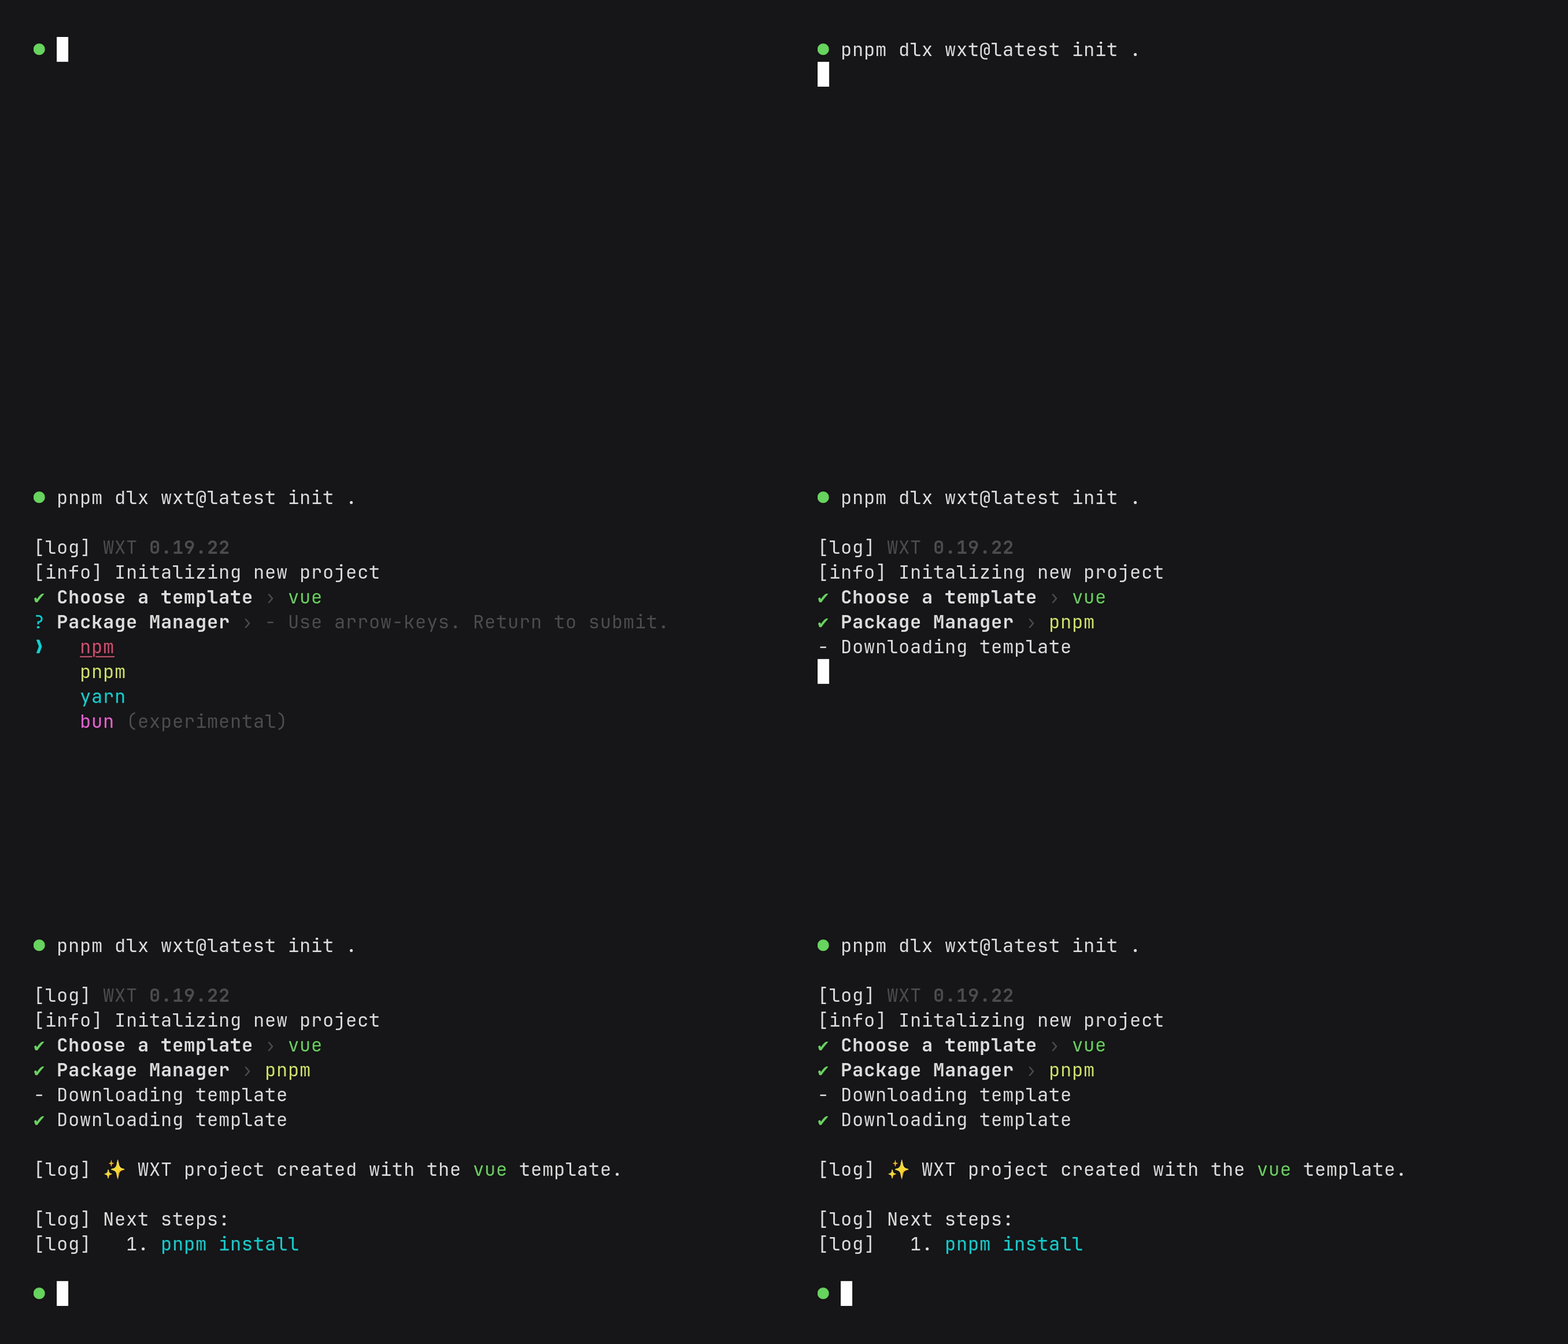
init 커맨드를 실행하고 안내에 따라 진행하세요.
sh
pnpm dlx wxt@latest initsh
bunx wxt@latest initsh
npx wxt@latest initsh
# 처음에는 NPM을 사용하되, 프롬프트가 나타나면 Yarn을 선택하세요
npx wxt@latest init데모

dev 커맨드를 실행한 후에는 다음 단계로 넘어가세요!
처음부터 시작하기
- 새 프로젝트 생성sh
cd my-project pnpm initshcd my-project bun initshcd my-project npm initshcd my-project yarn init - WXT 설치:sh
pnpm i -D wxtshbun i -D wxtshnpm i -D wxtshyarn add --dev wxt - 엔트리포인트 추가,
my-project/entrypoints/background.ts:tsexport default defineBackground(() => { console.log('Hello world!'); }); package.json에 스크립트 추가:json{ "scripts": { "dev": "wxt", "dev:firefox": "wxt -b firefox", "build": "wxt build", "build:firefox": "wxt build -b firefox", "zip": "wxt zip", "zip:firefox": "wxt zip -b firefox", "postinstall": "wxt prepare" } }- 개발 모드에서 확장 프로그램 실행WXT가 자동으로 브라우저 창을 열고 확장 프로그램을 설치합니다.sh
pnpm devshbun run devshnpm run devshyarn dev
다음 단계
- WXT의 프로젝트 구조와 필수 개념에 대해 계속 읽어보세요.
- 개발 모드 중 브라우저 자동 시작을 설정하세요.
- WXT 예제 라이브러리를 탐색하여 특정 API를 사용하거나 일반적인 작업을 수행하는 방법을 확인하세요.